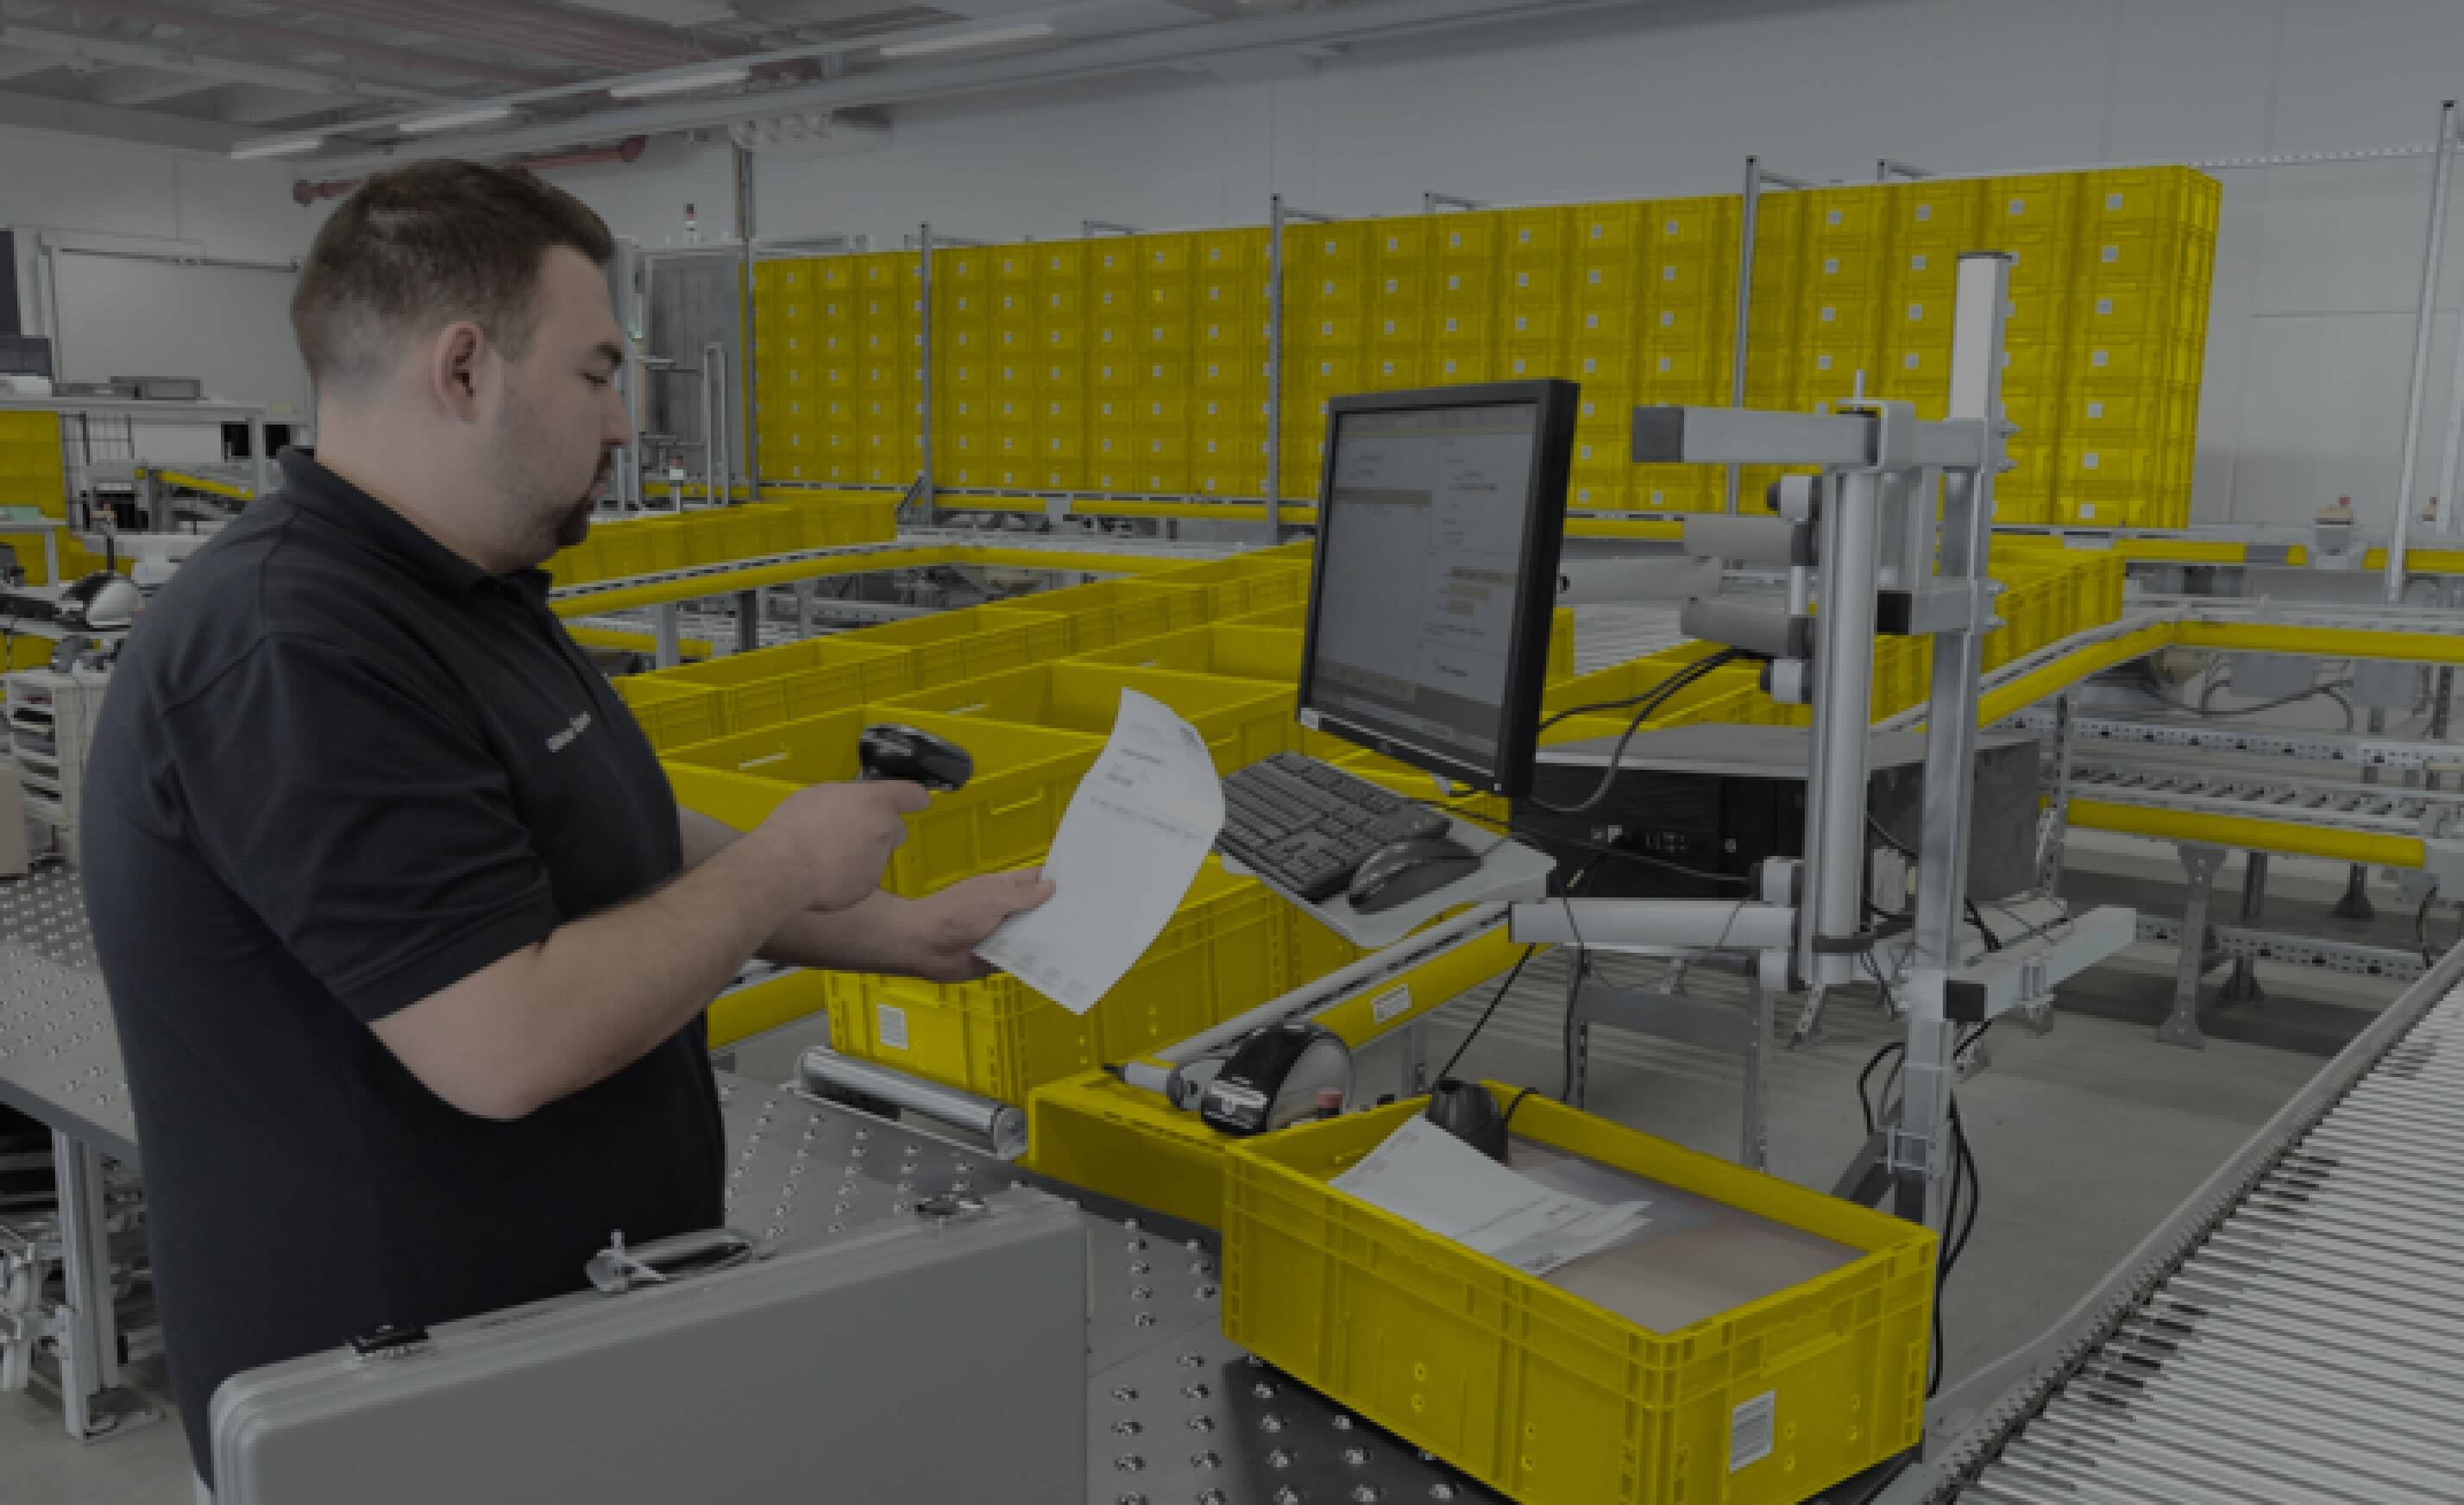
Driver for the Logimat SLL

The Logimat SLL Shark Control Module is designed for the controlling the SLL Logimat generation, using the NGKP communication protocol. It supports the following features of the Logimat:

Configuration

Logimat PLC Configuration

To make changes here, you must be logged in as SSITechnician.

The version of the PLC can be found here:

LogiDriver

Open the LogiDriver Parameter menu. The menu depends on the PLC version

This is how the LogiDriver must be configured PLC version before 2.0.

This is how the LogiDriver must be configured PLC version after 2.0.

Be sure that:

Check Local ID : Disabled

Check Configuration

From the PLC “Visualization” (VNC viewer), the PLC configuration can be checked:

The receiver and sender port must be configured in LogiSoft as well.

Step 1 – Check the Logimat is connected to the LAN

Before starting the configuration, check the following:

  1. The Logimat must have the LogiDriver option.
  2. A LAN cable must be connected to the router in the Logimat PLC enclosure.

Step 2 – Logimat PC Configuration

The Logimat PC should already be configured. The standard configuration looks like (Connection 2) :

Step 3 - Configuration of the Logimat Router (firewall)

The router is expected to be configured with the default SSI setup as described in the document “Firewallkonfiguration Weidmüller IE-SR-2GT-UMTS/3G”. If this is done the router can be reached at http://192.168.80.1 on the LAN side.

The login to the router is:

   
Login admin
Password <password>

The only change made here, is that the WAN IP configuration is changed to DHCP. The router can also be configured with static IP and more security if required.

Set the WAN IP configuration to DHCP.

Step 3A - Configuration of the Logimat Router with server installed

Shark Control

If the control of the Logimat is done from an external server and not from the client running on the Logimat PC, two ports have to be forwarded through the router.

  1. Create two forward rules from the router WAN address to the PLC for port 2011 and 2012 (or whatever the PLC is configured to use). If the rule already exist, modify the existing rule. 
  2. Setup a packet filter from the external server allowing port 2011 and 2012 to be forwarded (still 2011 and 2012 depends on the PLC configuration). 
  3. Restart the Router after configuration.

Configuration of port forwarding.

Local IP is the server you are connection from

Configuration of the Packet Filter.

Step 4 – Installing the LogiSoft Client

After the router is configured, the LogiSoft client can be installed from the application server. This is done the usual way from the web server:

http://<logisoft server>:8086

Step 5 – Configuration in LogiSoft

When LogiSoft is installed and started, open the configuration menu to define the new module:

Press “Config” in the Module Setup pane, to configure the Logimat.

Typical there will be nothing to configure, just press “OK” to confirm. The IP address and other settings is typical the same for all machines.

Parameter Default Values Description
Sender Port 2021 This is the PLC NGKP sender port for the PLC.
Receiver Port 2022 This is the PLC NGKP receiver port for the PLC.
IP Address 192.168.80.5 The IP address of the PLC.
Sender ID 201 NGKP sender ID
Receiver ID 101 NGKP receiver ID
Tray Width   Width of the tray in mm (used for the pointer)
Tray Depth   Depth of the tray in mm (used for the pointer)
Tray Tilt Angle 0-30 This is the angle in degrees for tilted trays.

The SLL configuration menu actually changes parameters in the “registry”, here all configure parameters can be found, but it will typical not be needed to configure at this level.


Low level configuration of the Logimat SLL.

Step 6 – Check the Logimat is working from LogiSoft

First restart LogiSoft after the Logimat has been configured.

Now the Logimat should be working. If everything is OK, it is just to start working. If not, check the connection by opening the Device Server window from the menu System Information -> Device Server in LogiSoft.

This will open the Device Server Window:

Look at the status for the module, here “A1”. If it says “Trays reported” the connection is working, it means that the Logimat has responded to a request for the tray configuration.

Check the “Visualization” interface for the PLC. Check that telegrams are going both directions. When LogiSoft starts it will send TT7030 and TT7034 to the PLC, they must be visible at the “Receiving port” column.

In response the PLC will send a number of TT7037 telegrams (one for each installed tray).

If the communication is not working, look at trouble shooting section.

Configuration of LogiWork

With LogiWork the height of the tray in opening can be adjusted. It is in LogiSoft related to the operator, so each operator may have individual height.

LogiSoft needs to have the lower lift height specified to work probably. This is the distance in mm from the floor to the first (lowest) tray support. The typical value is 750 (mm). It can be set in the configuration panel for the Logimat or in the Registry at Registry -> Devices -> Vertical Lifts -> name of the lift, set the parameters “LiftHeightMin_mm”. 

The LogiWork feature must also be be enabled in the Product Key!

Measure the distance from the tray support to the floor.

LogiTilt

Tilt of trays are supported. The Tilt angle can be set for each Logimat. The following must be configured:

If the tray will tilt or not must be set for the tray in the general module-tray configuration. So even tilt is enabled for the Logimat Driver, it must also be activated for the specific tray in SHARK.

Tilt must be enabled for each tray. If the “tilt” column is not visible, it is probably due to a Product Key where Tilt is not activated.

LogiDual

LogiDual is a feature that allows a tray to be fetched while another one is in the opening. It is fully supported by SHARK from build 1599.

The LogiDual mode can only be activated when the Logimat is idle. This means no trays in opening or elevator. This means that if SHARK is restarted with trays in the opening, the might be problems in changing the mode. The Logimat left the LogiDual mode, if SHARK is restarted.

This indicates that the Logimat has successfully entered LogiDual mode.

Configuration of the LogiDual mode:

1. A global flag, called UsePrefetch, must be enabled to support the LogiDual mode.

Setting the “prefetch” flag, makes the system generate a list of the next expected trays to come. The is used by the LogiDual feature to prefetch trays.

2. For each Logimat, the LogiDual mode must be enabled. It can be done by the Logimat SLL configuration panel or directly in the Registry|:

Devices->VerticalLifts->module name->LogiDual = true.

Setting the LogiDual mode from the Logimat SLL configuration panel.

How to test LogiDual

It is possible to check if Shark Control is able to fetch dual mode trays by a simple command that can be reach using the telnet interface or from the Device Server screen.

The command is called “Dual <tray>, <next tray>

For example:

This will fetch tray 3 and tray 4 as dual mode tray from the Logimat called “011”.

LogiDrive

Must be enabled in the SLL configuration panel. In SHARK it is now available as the “Stub” functionality.

It will never extract the tray immediately, but will bring the tray to the opening and a second step has to be activated to extract the tray.

The tray is inserted again, on the tray return command.

LogiBar - The Confirmation Bar

The confirmation bar is a light bar below the opening that can be used for pick confirmation instead of scanning a barcode or acknowledge on the screen. The feature is always enabled in Shark, but to make it work:


Delayed return of Trays

There is a configuration parameter “TrayReturnDelayMS” that set a delay from the tray is requested to be returned, to the movement actually starts. This is usefull  if the touch monitor is used for confirmation, this is placed behind the light curtain and if the operator is not quick enough, the movement may start before the arm is out of the light curtain, which means an emergency stop. The value is set in milliseconds, a typical value is 2000 for a 2 seconds delay.

LogiPointer Configuration

The only required setup for this is the dimension of the tray. The calibration is done in the PLC.

There are 5 parameters to set.

Parameter Value Description
TrayWidth_mm Integer Width (inner measure) of the tray in mm. Typical value is “4000”.
TrayDepth_mm Integer Depth (inner measure) of the tray in mm. Typical value is “820”.
LightSetBeforeTray Boolean true/false If true the pointer will be set before the tray arrives in the opening. Default is false.
LightSetAfterTray Boolean true/false If true the pointer will be set after the tray arrives in the opening. Default is true.
PointerUseActuallyTrayHeight true/false For goods with a certain height in combination with small locations, it can be difficult to point correctly to the goods, due to the angle of the pointer (especially in the back). If enabled this will correct the pointer according to the measured height of the goods. If false the defined tray height will be used.

The reason for the LightSetBeforeTray/After is that the PLC will not accept the pointer to be set before the tray is on place. The parameters allows this behavioir to be changed, if the PLC firmware is updated in the future (the avoid waiting for the pointer).

Multiple Openings

Multiple openings are supported.

Because the Logimat only can be controlled from one PC, a master/slave configuration has to be configured. In general it works like:

  1. Configure SHARK in the PC for opening 1 as a standard configuration, where this PC is controlling the Logimat (Shark Control is embedded).
  2. Configure the SHARK PC for opening 2, so it will use the same “Shark Control” as opening 1. So basically opening 2 is requesting trays through the PC for opening 1.

More openings than 2 are also supported, but they willl all use the PC for opening 1 as master.

The number of openings must be set in the configuration and match the physical machine.

Possible conflicts with multiple openings.

Since the multiple openings are sharing the same trays and lift, there are some obvious risk of conflicts if the openings are used in parallel.

The default behaviour, in case the same tray is requested to 2 or more different openings, is that an error will be generated for the second request.

There is support for a mode, where the second request will be queued until the tray is returned from the first opening. No error will be generated in case the requested tray is unavailable. There is a possible dead-lock risk in this mode.

Control of Light in the Opening

There is no standard support for turning on/off the light in the Logimat opening, but it is supported by the driver and can be implemented by client scripting. Typical use is to turn on the light in the active opening and turn it off in the others.

*To allow SHARK to control the light, please change the mode for the “bulb” on VNC Viewer for the PLC.

External Control of the Logimat

There is an optional possibility to perform low level control of the Logimat by using the Web Service interface to Shark Control. The Web Service is a RESTful implementation.

Where Sharks works at a high level with article numbers, location address, etc. the low level interface support control at tray level with basic features like:

The default port number is 8095, but this can be changed in the configuration.

Communication between an external system and Shark/Logimat for low level control.

Configuration of the Web Service Port in Shark.

Most of the commands, requires a module name to identify the Logimat. This is due to the fact, that one PC may control more than one Logimats.

The Web Interface can be easily testet by using a standard Web Browser. If it is not possible to access Shark from an external PC, please check the Windows Firewall that might block for external access.

The response can be seen in the browser window.

The response is XML formattet and relative simple to interprete.

REST Commands

The following commands are supported.

/command/logimat/<Module>/gettray

Move a tray to the gate. If there already is a tray at the gate, this will be returned first.

The call will return immediately, to get status and information about when the tray will be ready, use the «statusxml» command to poll for current status.

Command: http://:/command/logimat/\<Module\>/gettray

Parameters

traynumber=<tray>
tilt = true/false           (optional, default false)
gate=1/2/3/4                (Opening number) (optional, defalt 1)
lightxpos*=<0.0 .. 1.0>     (optional)
ightypos=<0.0 .. 1.0>       (optional)

Response

<SharkControl>  
  <Status>OK|Error</Status>  
  <ErrorCode>error code</ErrorCode>  
  <Message>error message</Message> 
</SharkControl>  

Example

To get tray 3:

http://localhost:8095/command/logimat/a1/gettray?traynumber=3 

To get tray 3 with tilt:

http://localhost:8095/command/logimat/a1/gettray?traynumber=3&amp;Tilt=1 

To get tray 3 from opening 2:

http://localhost:8095/command/logimat/a1/gettray?traynumber=3&amp;Gate=2

Procedure to get a tray with support for changed height:

Use: “/command/logimat/<Module>/gettray” to get the tray. Use: “/query/logimat/<Module>/statusxml” to read the status from the Logimat. While the Logimat is working, it is busy and will return state=Busy. Poll the status until state is “OK” og “ERROR”.

/command/logimat/<Module>/returntray

Return the current tray at gate.

If the height is changed, the tray will not be returned, but will generate an error. To automatically accept a changed height, add the “accept=true” parameter to the command.

Command: http://:/command/logimat/\<Module\>/returntray

Parameters

|gate=1|2|3|4 (Opening number)

Response

<SharkControl>  
  <Status>OK|Error</Status>  
  <ErrorCode>error code</ErrorCode>  
  <Message>error message</Message> 
</SharkControl>

Example

Return the current tray in the opening:

http://localhost:8095/command/logimat/a1/returntray

Return the current tray from opening 2:

http://localhost:8095/command/logimat/a1/returntray?Gate=2

/command/logimat/<Module>/returntrayacceptheight

Return the current tray at gate. If the height is changed it will be accepted immediately.

Command: http://:/command/logimat/\<Module\>/returntrayacceptheight

Response

<SharkControl>  
  <Status>OK|Error</Status>  
  <ErrorCode>error code</ErrorCode>  
  <Message>error message</Message> 
</SharkControl> 

Example

Return the current tray at gate:

http://localhost:8095/command/logimat/a1/returntray
http://localhost:8095/command/logimat/a1/returntrayacceptheight

/query/logimat/<Module>/statusxml

Returns the current automat status formatted as XML.

It Can be used to detect if the Logimat is busy working, ready for the next operation or in an error state.

Command: http://:/query/logimat/\<Module\>/statusxml

Response

<SharkControl>  
  <Status>OK|Error</Status>  
  <ErrorCode>error code</ErrorCode>  
  <Message>Error message</Message>
  <Response>
       <State>state</State> 
       <Text>status text</Text>  
  </Response>
</SharkControl> 

Example   Get status for automat A1:

http://localhost:8095/query/logimat/a1/statusxml

Status: Is OK when the command is accepted.

State: Is the current state of the Logimat, it can be READY, BUSY, ERROR, NOT_READY or MANUAL. MANUAL means the Logimat is put into manual control by the operator and cannot be remotely controlled, NOT_READY means that the Logimat is not connected or it has not been possible to read the configuration from the Logimat.

Text: Is a textual description of the current state and optional an error message.

/command/logimat/<Module>/light/go

Set the location light to a specific position in the tray as a floating number between 0 and 1.

Some positions:

Tray Position XPos Ypos
Lower left corner 0.0 0.0
Upper left corner 0.0 1.0
Upper right corner 1.0 0.1
Center 0.5 0.5

Command

Opening 1:

http://<host>:<port>/command/logimat/\<Module\>/light/go

Opening 2:

http://<host>:<port>/command/logimat/\<Module\>/light2/go

Parameters

xpos=<0.0 .. 1.0>
ypos=<0.0 .. 1.0>
tilt=true|false

Response

<SharkControl>  
  <Status>OK|Error</Status>  
  <ErrorCode>error code</ErrorCode>  
  <Message>error message</Message> 
</SharkControl>

Examples

Set the light to the middle of the tray (0.5,0.5) :

http://localhost:8095/command/logimat/a1/light/go?xpos=0.5&amp;ypos=0.5

  Set the light to the middle of the tray (0.5,0.5) with tilt activated:

http://localhost:8095/command/logimat/a1/light/go?xpos=0.5&amp;ypos=0.5&amp;tilt=true

/command/logimat/<Module>/lift?Height=<height>

Set the height of the optional lift.

The lift cannot work with a tray in the opening or when the Logimat is operating.

Command: http://:/command/logimat/\<Module\>/light/go

Parameters

height=<0.8 .. 1.0> The height of the lift in meters

Response

<SharkControl>  
  <Status>OK|Error</Status>  
  <ErrorCode>error code</ErrorCode>  
  <Message>error message</Message> 
</SharkControl>

Example

Set the lift height to 0.9 meter:

http://localhost:8095/command/logimat/a1/lift?height=0.9

/command/logimat/<Module>/reseterror

This will reset a possible PLC error.

Command: http://:/command/logimat/\<Module\>/reseterror

Response

<SharkControl>  
  <Status>OK|Error</Status>  
  <ErrorCode>error code</ErrorCode>  
  <Message>error message</Message> 
</SharkControl>

Example

Reset an error condition:

http://localhost:8095/command/logimat/a1/reseterror

Error Codes

The following error codes may be returned.

   
Error Code Description
1 OK
1000 Syntax error
1018 General error code. Will for example be returned due to an unknown REST command. This can happen during initialization, before the Logimat module is started.
1028 Not yet initialized.
1203 Automat is in manual mode.
1204 Goods height is exceeded.
1235 Goods height has changed. This means that the tray will not be returned until the change of height has been accepted.

Command Interface

The Telnet Interface to Shark Control supports low level control of the Logimat for debugging. The commands can also be used in scripting and for simple file control of a SHARK WCS Driver solution.

Some convenient commands are (the examples is if the module is called A1):

Get a list of all trays

LOGIMAT:A1:TRAY:LIST? 

Get information about a specific position:

LOGIMAT:A1:TRAY:POSITION? \<position number\> 

Returns: <position>,<tray>,<height in mm>

Set a specific position:

LOGIMAT:A1:TRAY:POSITION \<position\>,\<tray\>,\<height in mm\>

Commands

This is a list of all available commands.

ARRIVALTIME?

Returns the absolute time in ms when the tray is expected in the gate

AUTOCONFIG

BUSY?

DEBUG

Enable/disable debug output

Parameter Type Default Description
Function STR ALL Available flags: ALL/DETAILS/EVENTS/BOXTRACE/TELEGRAMS/STATUSLOOP/REGISTERACCESS/COMMANDS
Mode BOOLEAN yes If true debug messages will be printed to standard output

DEBUG?

DEFAULTGATE

The default gate used in GetTray commands. Mainly used for debugging

Parameter Type Default Description
GateNumber INTEGER 1 Default gate number (1-4)

DEFAULTGATE?

Get the default gate used in GetTray commands

DELAY

Set the simulation delay parameters

Parameter Type Default Description
delay1 FLOAT 500 Delay 1 - Time for the horizontal movement [ms]
delay2 FLOAT 100 Delay 2 - Time used for each tray position [ms]

DIALOG

Start a dialog on the control panel

Parameter Type Default Description
Gate INTEGER 1 Opening number
OrderNumber STR   Order Number to display
Article STR   Article Number to display
Qty STR   Quantity to display
Note STR   Note to display

FETCH

Get a tray to the gate

Parameter Type Default Description
Carrier INTEGER   Tray number
ID STR   User supplied ID
Tilt BOOLEAN off Enable/disable tilt of tray
TrayHeight FLOAT 0.0 Height of tray
Pointer_X FLOAT 0 X Location 0 -1
Pointer_Y FLOAT 0 Y Location 0 -1
LightXWidth FLOAT 0 X Width Location 0 -1
LightYDepth FLOAT 0 Y Width Location 0 -1
Next STR   Next tray expected to following current tray
Opening INTEGER 0 Gate (1-4) used for current operation
Text1 STR   Text to display
Text2 STR   Text to display
Text3 STR   Text to display
Text4 STR   Text to display

GETTRAY

Get a tray to the opening. Will automatically return the previous tray, if that still is in the opening.

Parameter Type Default Description
TrayNumber INTEGER   Tray number
ID STR   User supplied ID (will be returned in the tray-at-gate event)
Tilt BOOLEAN off Enable/disable tilt of tray
TrayHeight FLOAT 0.0 Height of tray (used for pointer calibration)
LightXPos FLOAT 0 X Location 0.0 - 1.0 (lower left is ref, value in % of tray width)
LightYPos FLOAT 0 Y Location 0.0 - 1.0 (lower left is ref, value in % of tray depth)
LightXWidth FLOAT 0 X Width Location 0.0 - 1.0 (Width of the location in %
LightYDepth FLOAT 0 Y Width Location 0.0 - 1.0 (Depth of the location in %
NextTray STR   Next tray expected to following current tray
Gate INTEGER 0 Gate or opening number(1-4) for the current operation
Text1 STR   Text to display on PLC display line 1 (if available)
Text2 STR   Text to display on PLC display line 2 (if available)
Text3 STR   Text to display on PLC display line 3(if available)
Text4 STR   Text to display on PLC display line 4(if available)

Example

Simple get tray 5: GetTray 5

Get tray with light pointer: GetTray 5,0,false,0,0.4,0.7

Get tray with tilt: GetTray 5,0,true

Get tray to opening 2: GetTray 5,0,false,,,,,,2

GETTRAY?

Request the specified tray and returns the time when the tray is expected in the gate

Parameter Type Default Description
TrayNumber INTEGER   Tray number
ID STR   User supplied ID
Location STR   Shark location address

GT

Simple get for turbo trays (convenient command for testing)

Parameter Type Default Description
Tray INTEGER 0  
TurboTray INTEGER 0  

HELP?

Parameter Type Default Description
Command STR   Command name

HELPHTML?

Parameter Type Default Description
Filename STR /users/sos/tmp/helphtml.htm help.html

HELPMARKDOWN?

Parameter Type Default Description
Filename STR /users/sos/tmp/helpmarkdown.md help.md

INIT

Initilize the automat connection

Parameter Type Default Description
Port STR   The port used to connect to the Automat
Address STR   Automat address on the PLC network

LIFT

Set the lift

Parameter Type Default Description
Height FLOAT 1.0 Lift height in meter
Gate INTEGER 0 The gate that will be used

LIFT?

Set the lift

Parameter Type Default Description
Gate INTEGER 0 Gate number to get lift height off

LOADREG

Load setup from the Shark Registry

REGISTEREVENTHANDLER

REGISTRYKEY

Set a registry value. The key must already exists

Parameter Type Default Description
Key STR   Registry key
Value STR   Value

REGISTRYKEY?

Read a registry value

Parameter Type Default Description
Key STR   Registry key

REGISTRYRELOAD

Load the registry for the module

REGISTRYROOT?

Returns the root path to the registry for this module

REGMONITOR

Setup up a monitor that will read PLC registers continously and send the result as an event when data is changed

Parameter Type Default Description
Register STR   Start register to monitor
Length INTEGER 1 Lenght of number block
Interval INTEGER 1000 Interval in ms to monitor
RepeatCount INTEGER 1 Number of times to repeat

REPORT?

Returns a module specific status report

RESETERROR

Parameter Type Default Description
Mode STR NORMAL NORMAL/ALL

RESTART

Reset the module to the original state

RETURNTRAY

Parameter Type Default Description
ReturnPos INTEGER 0 Return to other position
Gate INTEGER 0 The gate number from where the tray is returned

SAVEREG

Save current setup to the Shark Registry

SETWEIGHT

Update the database with the tray weight after returned

Parameter Type Default Description
Weight FLOAT 0.0 Set the weight to report (kg)

STATE?

Parameter Type Default Description
Opening INTEGER 1 Opening number

STATUS:DEBUG

Enable/disable debug output

Parameter Type Default Description
Function STR ALL Available flags: ALL/DETAILS/EVENTS/BOXTRACE/TELEGRAMS/STATUSLOOP/REGISTERACCESS/COMMANDS
Mode BOOLEAN yes If true debug messages will be printed to standard output

STATUS:DEBUG?

STATUS:ERROR?

STATUS:HELP?

Parameter Type Default Description
Command STR   Command name

STATUS:HELPHTML?

Parameter Type Default Description
Filename STR /users/sos/tmp/helphtml.htm help.html

STATUS:HELPMARKDOWN?

Parameter Type Default Description
Filename STR /users/sos/tmp/helpmarkdown.md help.md

STATUS:LOADREG

Load setup from the Shark Registry

STATUS:REGISTEREVENTHANDLER

STATUS:REGISTRYKEY

Set a registry value. The key must already exists

Parameter Type Default Description
Key STR   Registry key
Value STR   Value

STATUS:REGISTRYKEY?

Read a registry value

Parameter Type Default Description
Key STR   Registry key

STATUS:REGISTRYRELOAD

Load the registry for the module

STATUS:REGISTRYROOT?

Returns the root path to the registry for this module

STATUS:REPORT?

Returns a module specific status report

STATUS:RESET

STATUS:RESTART

Reset the module to the original state

STATUS:SAVEREG

Save current setup to the Shark Registry

STATUS:STATUS?

Returns the current status for the module

STATUS?

Returns the current status for the module

STORE

Parameter Type Default Description
ReturnPos INTEGER 0 Return to other position
opening INTEGER 0 The gate number from where the tray is returned

TILTSUPPORTED

Define if the automat supports tray tilt

Parameter Type Default Description
Supported BOOLEAN false If true tray tilt is supported

TILTSUPPORTED?

Returns if the automat supports tray tilt

TRAY:ADD

Add a tray to the Shark configuration (does not make any changes in the lift)

Parameter Type Default Description
TrayNumber INTEGER   Tray number to add
Position INTEGER   Position of the tray
Height INTEGER   Height of the tray in mm

TRAY:ADDGROUP

Adds a serie of trays, mainly for debugging

Parameter Type Default Description
FromTrayNumber INTEGER   First tray to add
ToTrayNumber INTEGER   Last tray to add

TRAY:CHECK?

Check for consistency tray table

Parameter Type Default Description
Clearance INTEGER 0 Needed clearance

TRAY:CONFIG?

Get the configuration for the specified tray (tray height in mm, position number

Parameter Type Default Description
TrayNumber INTEGER 0 Tray number to get info about, If empty all trays are returned

TRAY:INFO?

Returns info about the selected logical tray: position, tray, tray_heigh, back, distance, pos_height

Parameter Type Default Description
tray INTEGER 0 Logical Tray Number (empty shows all)

TRAY:LIST?

Return a list of all trays for the lift

TRAY:LOADTRAYCONFIG

Load the current tray configuraiton from a file

Parameter Type Default Description
Filename STR /users/sos/tmp/trayconfig.txt Name of file

TRAY:LOCK

Lock a trays position

Parameter Type Default Description
Tray INTEGER 0 Tray number to lock
Locked BOOLEAN true true/false flag lock or unlock tray

TRAY:POSITION

Set info for the specified position

Parameter Type Default Description
position INTEGER 0 Position
tray INTEGER 0 Tray Number
posheight INTEGER -1 Height in mm of the position
tray_height INTEGER -1 Height in mm of the tray if present
back INTEGER -1 0=Front, 1=Back
type INTEGER -1 1=Tray
distance INTEGER -1 Encoder value

TRAY:POSITION?

Returns info about the selected position: tray, heigh, back, distance, type

Parameter Type Default Description
position INTEGER   Position Number

TRAY:REMOVE

Remove a tray from SHARK’s configuration

Parameter Type Default Description
TrayNumber INTEGER   Tray number to add

TRAY:REMOVEALL

Remove all trays from Sharks configuration

TRAY:REPORT?

Returns a module specific status report

TRAY:SAVETRAYCONFIG

Save the current tray configuraiton to a file

Parameter Type Default Description
Filename STR trayconfig.txt Name of file
Mode STR Full Normal / Full / Restore

TRAY:STATISTIC?

Returns statistic information about fragmentation free (m), largest (m), % free, total used (m), total free (m), number of trays

TRAY:STATUS?

Returns the current status for the module

TRAY?

Parameter Type Default Description
Gate INTEGER 0 The gate number from where the tray is returned

TRAYACCEPT

Accept the current tray height

Parameter Type Default Description
accept BOOLEAN no If true accept the current tray height
Gate INTEGER 1 Gate number

TURBOSUPPORTED

Define if the automat supports turbo mode

Parameter Type Default Description
Supported BOOLEAN false If true turbo is supported

TURBOSUPPORTED?

Returns if the automat supports turbo mode

USERTEXT?

Return a list of user text strings

Trouble Shooting

Communication Problems

The communication is via the NGKP2 protocol. It requires 2 sockets and both must be working. If there are no response from the other side, the connection will be closed after 30 seconds.

In the PLC visualization, the connection from LogiSoft can be viewed. 

Check the IP address is correct for both ports, it must be the IP address of LogiSoft. 

Check telegrams are updated. Even when the system is idle there are keep alive telegrams every 10 seconds. They will not be displayed as TT.. telegrams, but is counted in “NGKP received/sent”.

The IP address of the connected LogiSoft is here 192.168.80.11.

LogiSoft has the possibility to log all telegrams between the PLC and LogiSoft. This can be configured in the Logimat configuration by:

This will generate a log file for each day. It will automatically delete files older than 2 weeks.

Simulation Mode

A simulation mode is available where the physical Logimat is simulated. The purpose is not make a 100% simulation, but to test an installation before the physical automats are available. It can also be used with Shark installations used for testing.

To use the simulation mode, set the Shark Control device type to “AutomatSimulate”.


  The simulator needs some knowledge about the possible configuration of the automat. Normally this information will be retrieved from the PLC in the machine, but when the machine is not available the information is needed somehow else. Shark Control allows the configution to be read from a file. Which file is specified in the Shark Registry.

The parameter is named “LoadTrayConfigFile”. The file is a text file that can be generated from a real installation, using the Shark Control command: 

Logimat:A1:Tray:SaveTrayConfig \<filename\>

(replace “A1” by the module name)

Installing VNC Server for Remote Access

If the Logimats PCs have no Internet connection, a possible way to get external access is from a local pc or server and use VNC. This is a guide for configuring the Logimat firewall for VNC.

Step 1

Create a packet filter.

  1. Press “Add a new rule set”.
  2. Name the new rule set “VNC”.

  1. Add a new rule.
  2. Set source IP to the SHARK Application Server (or from where the VNC client is running).
  3. Set mask to 255.255.255.255
  4. Set Destination IP to the IP of the Logimat PC.
  5. Protocol to “TCP”
  6. Press “Next”

  1. Set Source Port to “*”
  2. Set Destination Port to “5900”
  3. Press “Next”

  1. Set source port to “*”
  2. Set destination port to “5900”
  3. Press “Apply”

Step 2

Define a forward rule.

  1. Press “+” to add a new forwarder.
  2. Set the local IP to the firewall WAN IP.
  3. Set the local port to the external port used to access VNC (VNC default is 5900, but because more than one VNC server can be used, there must be mapped from another port, for example 5901, 5902, etc.)
  4. Target IP is the IP of the Logimat PC.
  5. Target Port is “5900”.
  6. Repeat from 3. until all Logimats are included.
  7. Press “Apply”

Step 3

Save and Reboot the firewall.