Manual Transactions
-
Manual Transactions
- Navigation
- Search (Pick, Put, Set)
- Put-away
- Pick Based on Item Number
- Getting an Automat Tray
- Storing articles on Existing Location
- Storing articles on Empty Locations
- Adjusting the Stock
- Reason Codes
- Adjusting Tray Layout
- Quick Move in Tray
- Viewing Tray information
- Show article image (optional feature)
- Using Manual Transactions in Zones with multiple Automats
- Configuration
- Scripting
- Used Order Types
Manual picking and putting is used for picking/putting away separate items without use of orders. The function can, among other things, be used in combination with small installations where there is no interface to an ERP system, but it is general useful for ad hoc picking and putting of items. The options are as follows:
- Search (Pick, Put, Set)
- Pick Based on Item Number
- Getting an Automat Tray
- Setting of Stock Balance
- Putting of Item on Existing Location
- Adjusting Tray Layout
The window for manual transactions has 4 tabs that each covers one of the four main functions. Having these four tabs ensures that one does not unintentionally carry out inexpedient actions.
If the system used with multiple article owners, enter the article number as: article number / owner. Normally “/” is used to separate the article number and owner, this can be changed by system configuration.
Navigation
Keyboard: F2
Menu: Transactions -> Manual Transactions
Then choose the desired function using the ”tab” (Pick, Put, Set, Tray Layout)
Search (Pick, Put, Set)
For both picking, putting, and stock setting it is possible to search for a particular article either by item number or description. Type as much of the number (in the number field) or name (in the name field) as you know and press [Search] or [Get Article]. The search will return:
One matching article: If there is only one article that matches the description, all fields will be filled with information about the given article.
Multiple matching articles: A list is shown, listing the potential articles. The desired article is chosen from the list using either the cursor keys up/down or the mouse.
No match: If no matching articles are found, SHARK will prompt you to create the item in the database as a new article. You can do this if you wish to do so. Thus, this function can be used as shortcut to creation of new items.
The difference between [search] and [Get Article] is that [Search] finds and updates the window, whereas [Get Article] first searches for the article and then gets the item (tray) if the work is carried out in an automat zone.
Normally, the search will be based on the beginning of the number or name. If one wishes to search on a part of the number or name figuring in any possible place in the text, one can begin the entry with a “%” character. For instance, a name search performed on the entry ”%screw” will return all the articles in which screw is part of the name.
Put-away
From the Put-away Tab one can search for and put away items. Depending on the configuration, it will sometimes be possible to pick based on an entry of an existing order number or on an entry of a particular transaction type.
Number: Article number.
Name: Article name.
Location: Location of the article.
Count (Location): Quantity on the location.
Box Type: Box type for the location in question.
Available: Shows the quantity available for picking from the location. Available quantity represents the actual quantity on the location minus transactions that have a particular number of the given item reserved. It is not possible to pick more than the number stated as the quantity available.
Quantity: Here you state the quantity that is wished to be picked.
Order Type: If one chooses a specific order type, an order with the given order type will be created for the pick. The ordernumber will be automatically generated.
Ordernumber: Here one can state an ordernumber of an existing order. It is not possible to combine Order Type and Ordernumber. If an ordernumber is stated, it must be an existing order and the order type will then appear from this order.
Status: Status of the picking progress.
[Get Article]: Search and get article (if automat).
[Search]: Search for an article when only a part of the name or number is stated.
[Get Tray]: For an automat location, this button can be used to get a tray.
[Print]: When a label printer is connected and a template has been created, the print button will print a label.
[Clear]: Clears all fields.
[Return Tray]: Returns a tray to the hatch (for automat zone).
[Close]: Closes the window.
The option to create new ordernumbers or reuse an existing one is a function that is used in connection with an ERP system that allows this. One way of using this is e.g. in connection with production orders where material is missing or surplus material is to be put away.
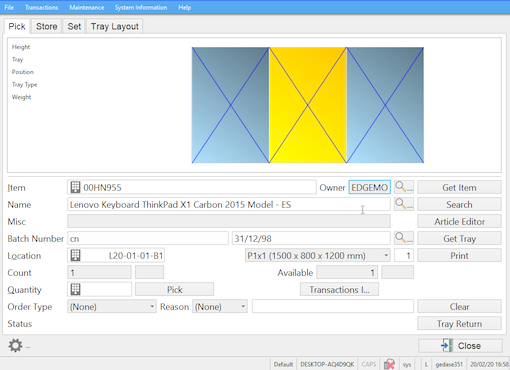
Pick Based on Item Number
Picking an item:
- Choose the Pick tab
- Type the item number and finish by pressing [Enter]
- In case the item is found at multiple locations, a menu from which the desired location can be chosen will appear
- The item is displayed and if it is an automat, the relevant tray will be loaded
- Type the desired quantity in the ”quantity” field
- Press [Pick]
Getting an Automat Tray
If one is standing in an automat zone and a location has been chosen it is possible to get the tray that the location is found in by pressing [Get Tray]
[Get Tray]: Gets the tray that is stated in the location field.
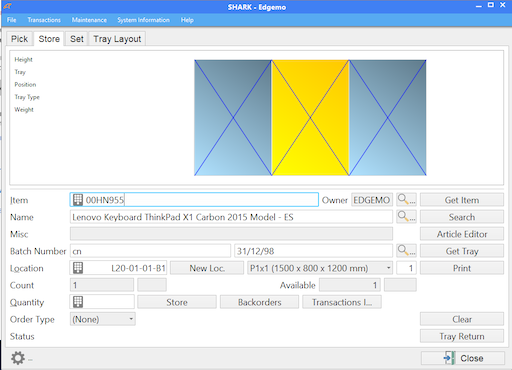
Storing articles on Existing Location
Storing an articles:
- Choose the put tab.
- Type the item number and finish by pressing [Enter].
- In case the item is found at multiple locations a menu from which the desired location can be chosen will appear
- The item is displayed and if it is an automat the relevant tray will be loaded.
- Type the desired quantity in the ”quantity” field.
- Press [Put].
Storing articles on Empty Locations
Storing an article on an empty location where SHARK determines the location:
Choose the put tab.
Type the item number in the item field.
Choose the location type that is wished to be found.
It is possible to type a part of the location name in the location field, e.g. “A1” in case one would want a location in automat A1:
- Press [New Location].
- Press [Get Tray]
- Type the desired quantity in the ”quantity field.
- Press [Put].
Adjusting the Stock
In certain instances it can be necessary to set the number of items that is registered in the stock. This can be done at any time when a valid item has been chosen. The function can be carried out whether the tray is in the operation opening or not.
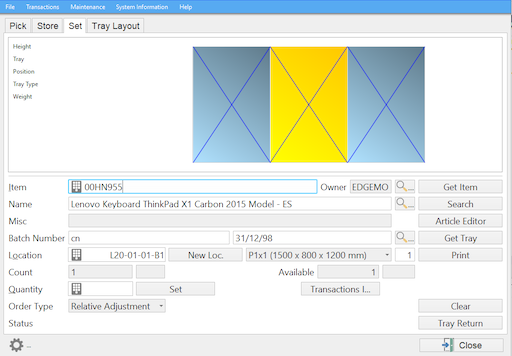
- Type the ”Item number” or scan the barcode.
- Press [Search] in order to carry out update while the tray is not by the operation opening (Automats) or click [Get Item] in order to get an automat tray and information about the quantity of the item.
- In the Quantity field the correct number of units at the location is entered.
- Press [Set] in order to update the database.
Reason Codes
Reason codes are a fixed list of reasons that can be used to specify why the stock is adjusted without an order from a host system. Optional a free text can be added as well.
The same functionality can also be used for supporting Cost Centers - who is going to pay for operation.
The reason codes can be specified from the menu Maintenance -> Reason Codes. This menu is not enabled by default.
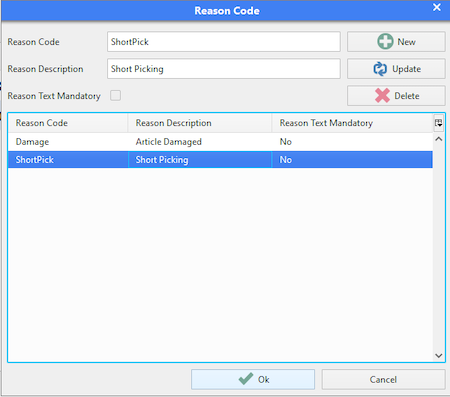
The reason codes also have to be activated in the Manual Configuration menu.
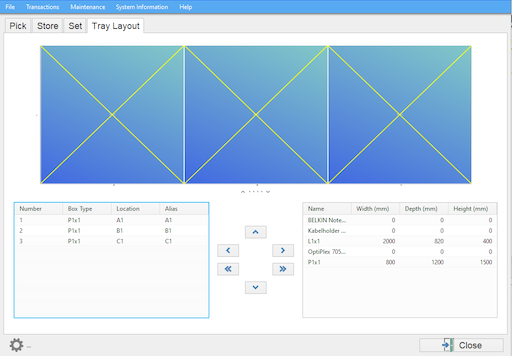
Adjusting Tray Layout
From the tab ”Tray Layout” changes can be made to the separate trays/shelves. Here, you can delete empty boxes and replace them with new ones as well as move around existing ones. The function is used exactly in the same manner as the Tray Editor, except from the difference that the changes are not made to the tray type but instead only to the selected tray.
Quick Move in Tray
Is it often need to have to move goods around in a tray, there is a “quick move” function. It is by default not available.
Quick move:
- Click on the location to move.
- Click on the [Move] button.
- Click on the target location.
To make the feature available, the configuration parameter MoveItemsInTrayAllowed must be enabled.
Viewing Tray information
If used in combination with automation, it is possible to show additional information about the current tray. It depends on the actually hardware what is possible.
Show article image (optional feature)
In the configuration, a path can be defined to an image folder. If available picture can be displayed. The name of the picture file is specified as a path where a place holder %ArticleNumber% will be replaced with the current article number.
Using Manual Transactions in Zones with multiple Automats
If you are working in a zone with multiple automats, there is some basic support to help when the requested article is not stored in the machine from where the request is made. If the requested article is in another automat, the tray will be fetched to the opening in the other machines, if the following conditions are true:
- The Manual Transaction window must be open on the other machine. It is not opened automatically as it is with the order picking window.
- There is a configuration parameter Force tray fetch in other module, that must be true. This can be set from the Manual Transactions Configuration Panel.
Note that it will not fill out the screen with the information on the other automat.
The reason for the limited support, for operating multiple automats with Manual Transactions, is that this function often is used with multiple operators working at the same time in the same zone and due to this, it will not automatically change the content of the screen on other PCs.
Configuration
There are a number of configuration options for the Manual Transactions.
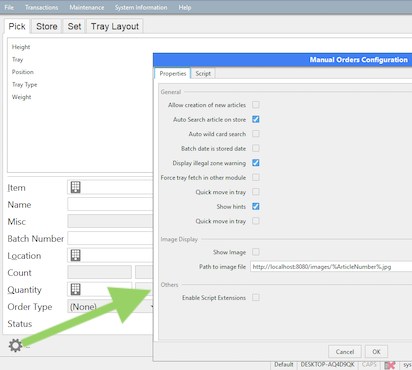
Open the configuration menu from the “gear button”. You must be System user to get access to this function.
Some of the parameters:
- Force Tray Fetch on other Module: This will fetch trays in other automats, if the requested item is in another machine and Manual Transaction is open on the other machine.
- Show Hints: This will show a list of possible matches in the search field.
- Quick Move in Tray: Enables a button that allows items to be moved from one location in a tray to another in the same tray.
- Auto Wild Card Search: You only have to enter the first part of the article number and press enter.
- Allow creation of new Articles: The operator is allowed to store articles with unknow article numbers.
Scripting
The Manual Transaction Window supports Grooovy scripting for customized extensions.
Used Order Types
When the manual transaction is performed, SHARK may generate an internal order. This order can be used for logging and reporting back to a host system, that a stock change has been made without an order from the Host System.¨
What order types are available, can be defined in the Order Type configuration.
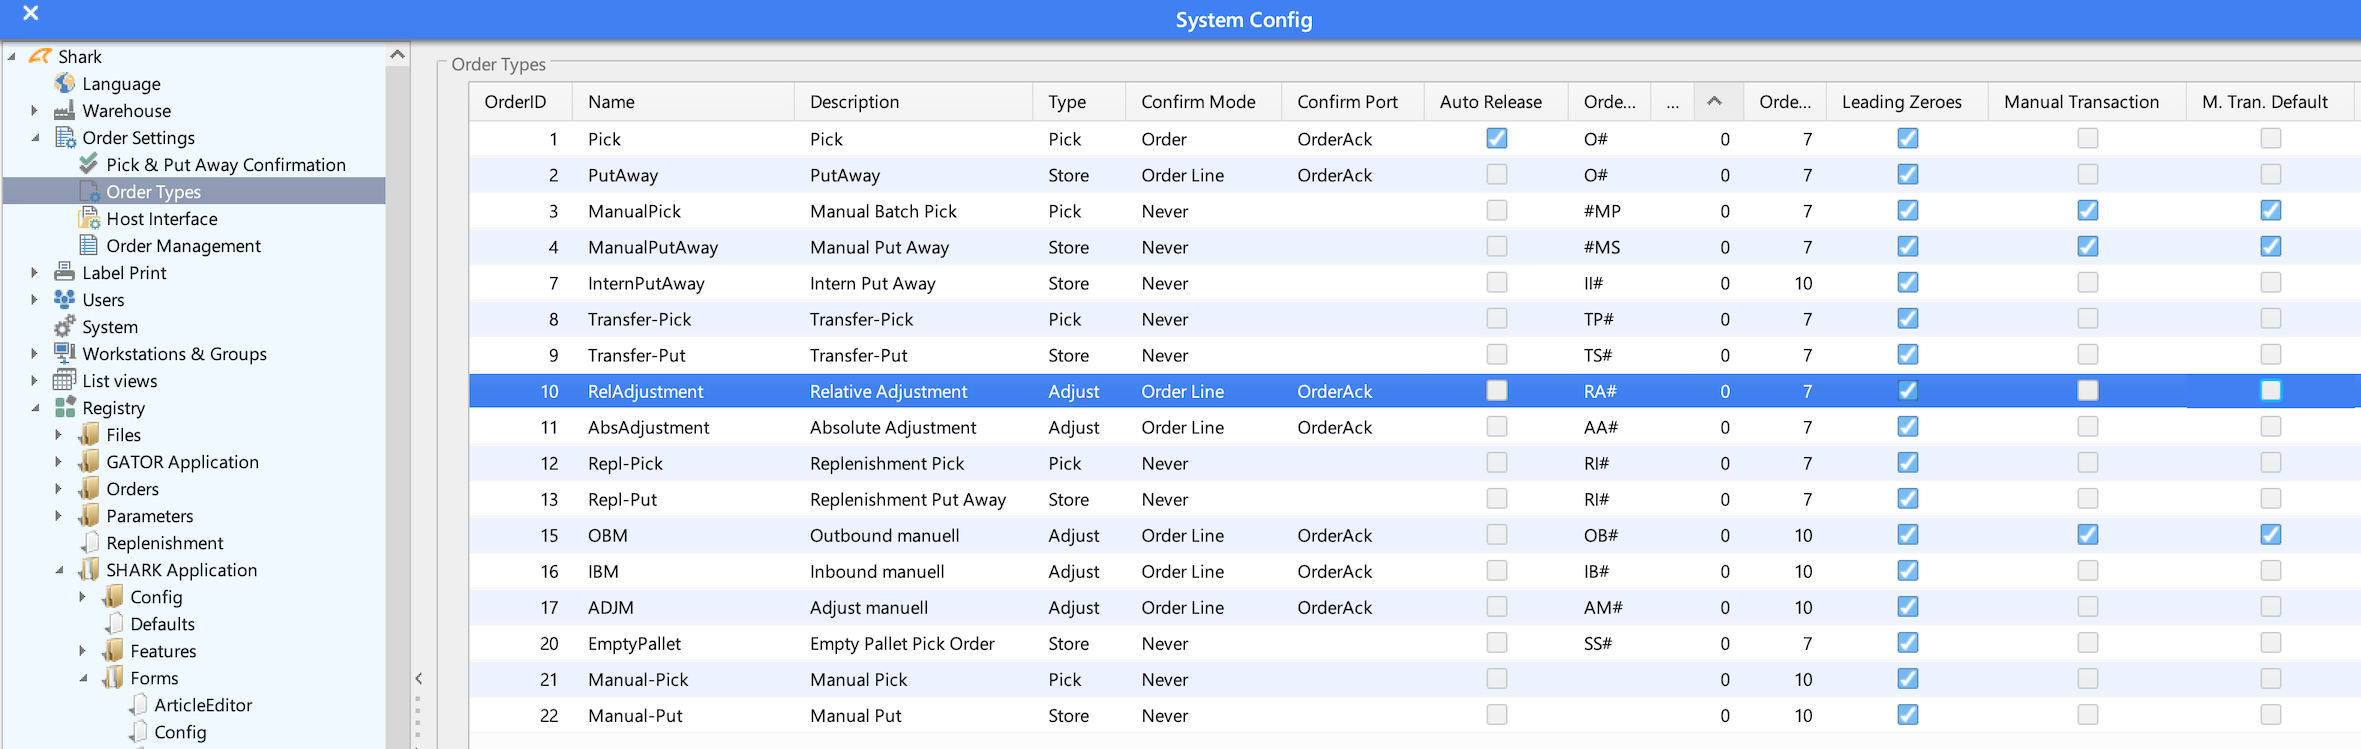
The typical configuration is to define Order Type 3,4 and 15. Select “Manual Transaction Default” for the order type that should be used as the default chose. Multiple order types can be defined, allowing the operator to tell the host the reason for the manual transaction.
There is a special type “none” that will not generate any order and thereby not report back to the host. This can be disabled by configuration.